BOWLER PERFORMANCE TRANSMISSIONS
INTERNAL PUMP INSTALLATION
FOR T56 MAGNUM ONLY
Bowler Performance Transmission| Late model ZO6 Corvettes and
Z/28 Camaros have internal oil pumps to provide external transmission
cooling. On the Z/28 the cooled oil is also run through a heat
exchanger in the differential cover, then back to the transmission.
When asked about T56 cooling needs, Camaro great Mark Stielow indicated a track driven T56 starts needing
transmission
oil cooling from around 450rwhp & up. Those driving Road Course
events with high horsepower engines should incorporate
transmission cooling to extend the life of their transmissions. In
researching cooling methods, I learned Bowler Performance Transmissions
sells a swap-in front cover with internal pump. It consists
of a standard front cover
specially machined to accept the Tremec pump, with a -6AN male outlet
fitting. A return line from the cooler can be run to either the fill
plug port, or drill & tap a hole in a boss near the reverse light
switch on the
right hand side.
Bowler Performance Transmission sells the front pump kits on an exchange basis. MAKE A STAND
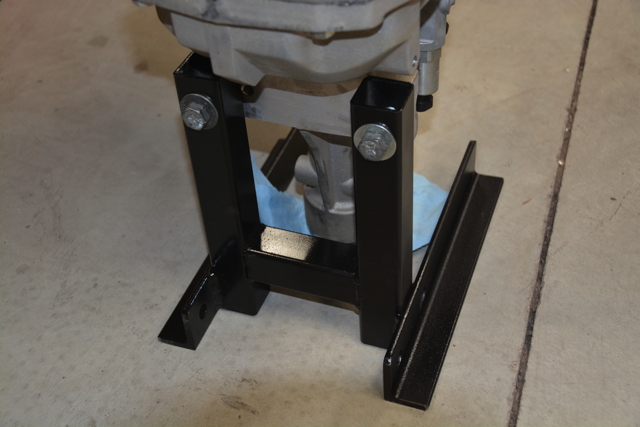
Step one is to build a stand that positions the input shaft straight up. This is the recommended position for front cover swaps. I built this out of square tube, it bolts to the rear mount. There is no reason it couldn't be made of wood, just make sure it holds the transmission steady, and leave a little room for a drain pan, tailshaft plug, or use an old yoke. This transmission was brand-new, so no oil dripped out. |
 |
|
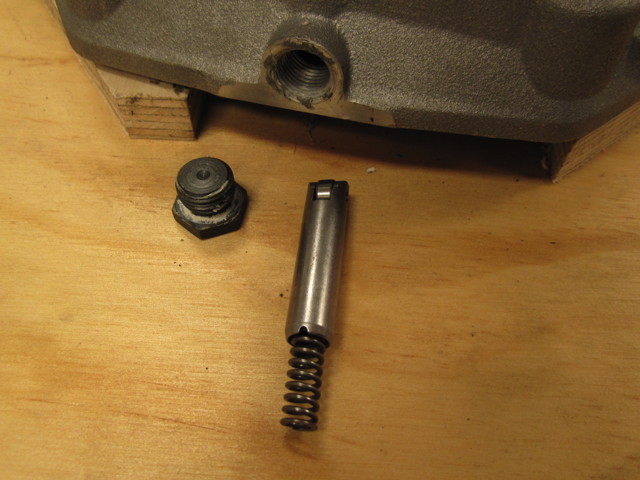
DETENT PLUNGER
Step one is to remove the plug, top front of the front cover. Inside is a spring and plunger that need to be removed. |
 |
|
REMOVE FRONT COVER
With input shaft pointed up, pull the front cover bolts, tap and pry on the front
cover to break loose the sealer and lift it off. Take care to not drop
the two bearing races. They are not press fit into the front cover. They are different sizes so you can't mix them up.
|
 |
|
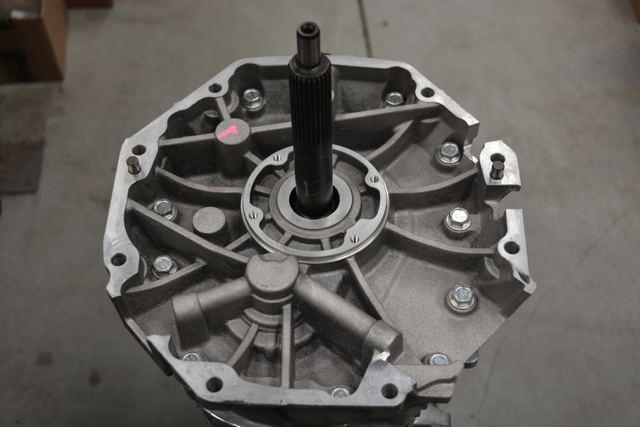
PUMP
The pump is driven
by a slot in the countershaft. The front cover comes with a new input
shaft seal installed and two
shift rod bushings, but without the two bearing races, they have to be
transferred from the old cover.They are a slip fit, can be dropped out
by facing the bearings down and slamming the cover down on two blocks
of wood. Keep an eye out, some races may have adjustment shims behind
them. I used a tiny pry bar that worked well.
|
 |
|
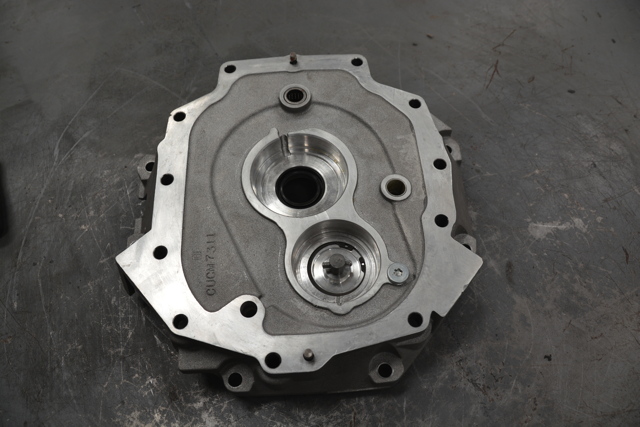
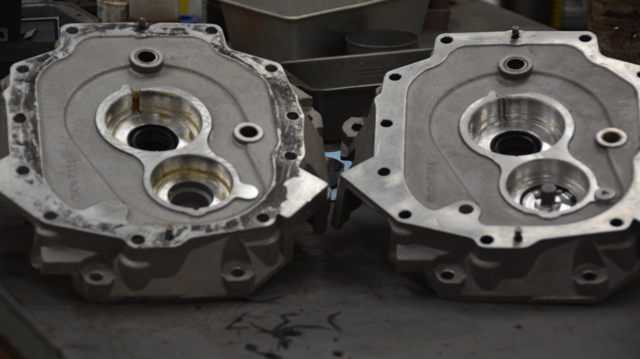
COMPARISON
New cover on the right. Note the hole on the lower left, for the pump inlet screen.
|
 |
|
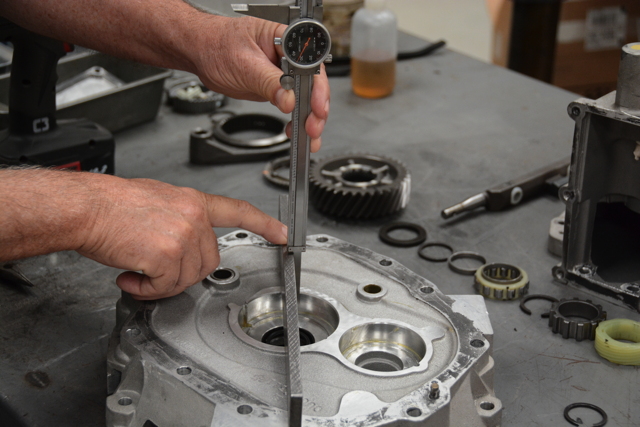
AS A CHECK
I used a straight
edge across the face, measuring to the bearing seat. Both covers were
within .001". If there was a significant difference, the bearings would
need to be shimmed. I know someone is going to ask "how much is
significant?" I haven't asked Bowler, but if I'd seen more than .005" difference, I would have contacted them for advice.As mentioned above, oil can be returned after cooling to the fill plug opening, or drill and tap the boss next to the reverse light switch on the RH side. If you decide to drill and tap, do it now. Have someone put a shop vac up against the inside where the drill will come through to capture the chips. Install the two bearing races, apply silicone case sealer in a 1/8" bead around the case sealing surface. I used Permatex "Right Stuff" in a pressurized can with nozzle. This seemed to be the most highly recommended product. It's available in Grey or Black. Install cover, taking care to not let the bearing races fall out. Install cover bolts, and torque to spec. Install shift detent roller plunger, spring, and plug, use sealer on the threads. |
|
|
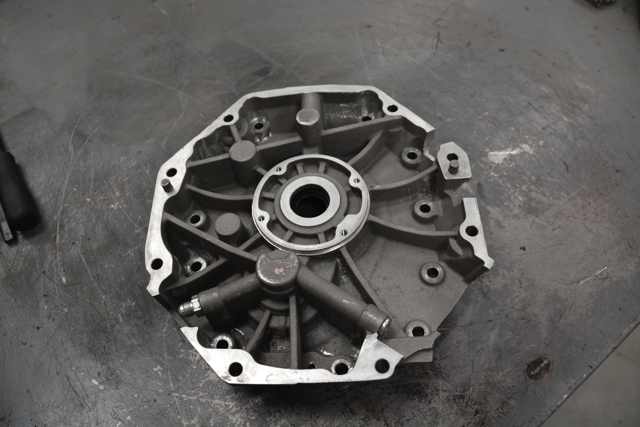
OUTLET FITTING
The outlet fitting is on the
Passenger side. I'm pretty sure it's a -6 AN which is 3/8". Plumb in
your cooler and return lines. I think an in-radiator tank heat
exchanger would also help warm up the trans faster for cold weather
use. I don't see why a standard automatic trans cooler in the radiator
tank wouldn't work well, or use an air to oil cooler.Don't forget to fill the trans with oil! Mark or tag it as needing oil if it will sit for a while. |
 |
|
PICKUP SCREEN, SPEEDOMETER PLUG
The pickup screen goes into the inlet hole on the lower driver's side.
Lube the O ring and push it in. I used an adjustable end wrench on it's
side, set it over the flange and tapped the wrench with a hammer to
seat the screen assembly. |
 |
| I couldn't resist using Bowler's beautiful speedometer drive plug, much more secure, - original on the left is pretty ugly and nothing holds it in. | 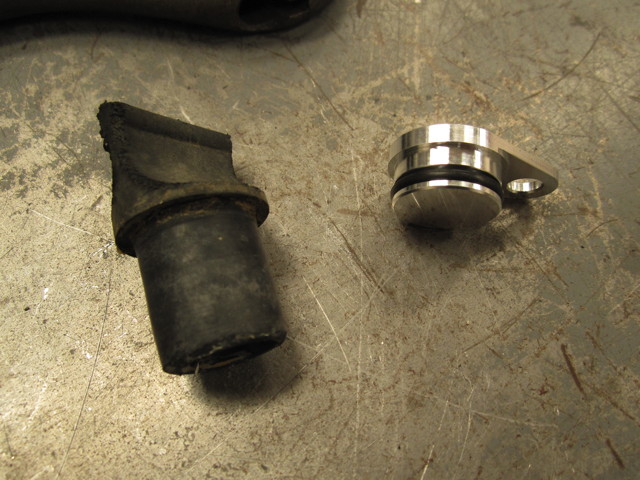 |
| I drilled and tapped the side fitting for the return line. The boss is next to the backup light switch on the right side near the front. I used a -6 AN fitting. This was just a test fit for thread depth. I cleaned up the chips before final assembly. | 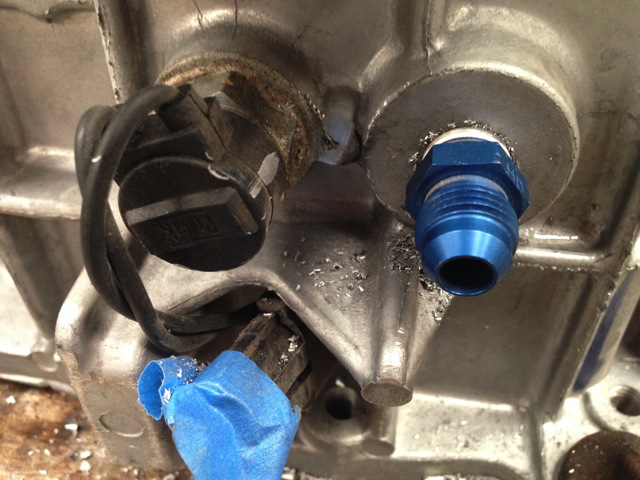 |