 TH400
CROSSMEMBERTH400
CROSSMEMBER
TH400
CROSSMEMBERTH400
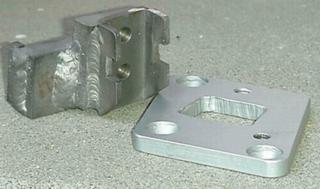
CROSSMEMBERI used this same crossmember setup on a 69 and the holes needed to be a little different spacing. It could be due to the 69's different engine mounts, and he was running a Lakewood bellhousing and saftey block plate. It was a little more to the rear than my 67.
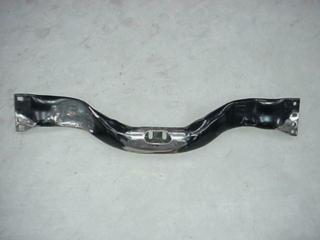
This is going into my 67 and my subframe does not have the closer bolt holes for the TH 400 so I added a tab with a hole at the rear edges of the ends to get the four speed crossmember spacing.
Rear of car would be to the top of photo.
* Note this crossmember is originaly for a big block which comes with the trans mount offset to the right. I had to make sure to put my holes in the middle.
 BOTTOM

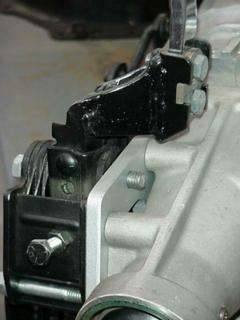
The shifter was moved down and forward by making a new adapter plate. The trans case was ground a little bit for clearance where the short rod passes near it. The Hurst manual cautions that this area may need to be ground even with the standard shifter location.
I had to bend the middle rod up just a little to clear the rear shift arm nut. They aren't connected to the shifter on this photo but are close to whre they should be.
You might have to trim the sleeve over the longest shift rod, mine was a bit long. There were enough threads though.
I put a shorter stop bolt in the front hole.
 STICK
OFFSET
STICK
OFFSETI drilled out the threaded holes in the Hurst plate that holds the stick to the shifter as the bolts are now going through it the other way.
I kept the stick parallel to the shifter, but moved forward 1" and toward the center of the trans 2", the stick is also about an inch higher to clear the trans.
The shifer mount plate has a hole cut in it to clear the shifter.
 SHIFTER
PLATE
SHIFTER
PLATEI had a really tough time doing the countersinks, even with a carbide countersink. I'd recomend making the plate out of aluminum if possible.
The new plate is 3/8" X 3.5" wide.
 HOLE
ALIGNMENT
HOLE
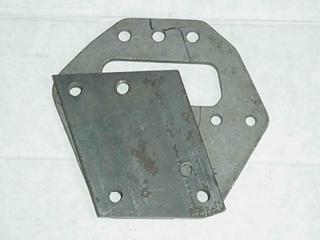
ALIGNMENTLook at the right hand upper hole on my plate, It mounts the top of the shifter body and is threaded 7/16". The next hole down on the right, is threaded 3/8" for the shifter.
The shifter body is moved down 1 1/2" and forward 1" by substuting this plate for the origonal.
A hole needs to be cut in the center of the new plate for shifter mechanisim clearance. It is marked in silver but does not show up on the photo.
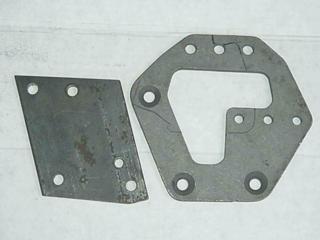
 Here
is a bolt on stick adapter on the left and a shifter adapter plate on
the right.
Here
is a bolt on stick adapter on the left and a shifter adapter plate on
the right.
You can see the new socket I made, similar to what is on the Hurst shifter only facing the other way.
|

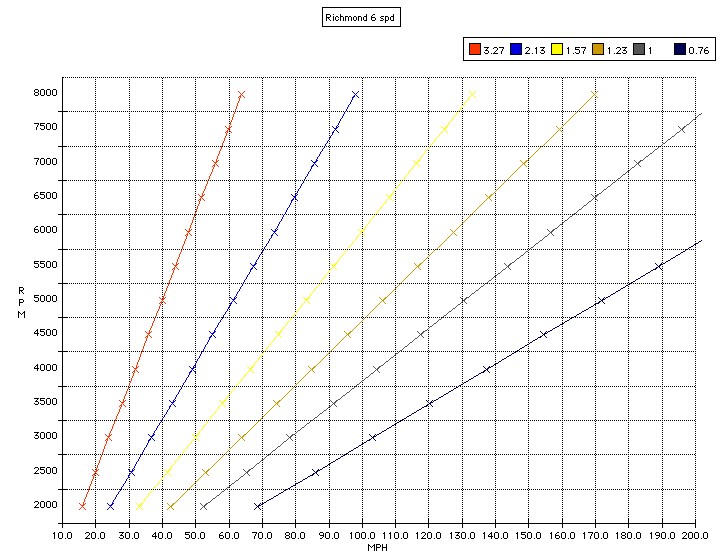
Above is the chart for the HD version of the Tremec five speed transmission. As you can see, there is more of an rpm drop when shifting gears with this transmission.
To find your rpm drop when shifting, just print this chart out and draw a vertical line from your engines redline rpm shift point down until it intersects the next gear line. Read the rpm's on the left, that is the rpm you will be turning after the shift.
Here is a link to a page with info on spedomiter calibration. A white driven gear works well with an 8 tooth blue drive gear and a 19 tooth driven gear with 3.08 rear gear.