47
Cadillac front disc brackets.
47
Cadillac front disc brackets.
47
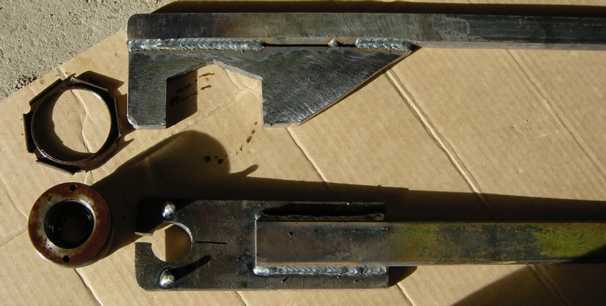
Cadillac front disc brackets.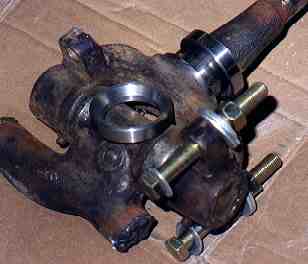 Here
is a shot of the spacer rings I made to make up for the disc hub
being longer than the spindle. One is on the axle, the one for the
other axle is on the other side.The inner bearing goes against it,
and the seal seals on it's OD.
Here
is a shot of the spacer rings I made to make up for the disc hub
being longer than the spindle. One is on the axle, the one for the
other axle is on the other side.The inner bearing goes against it,
and the seal seals on it's OD.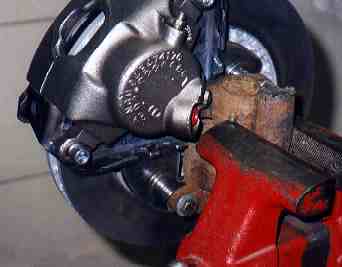 The rotor / hub is from a 68 Olds delta 88. It's an 1 1/4"
thick and 11 3/4" diamiter. This is a very large and heavy duty disc,
equal to a 70's half ton pickup truck!
The rotor / hub is from a 68 Olds delta 88. It's an 1 1/4"
thick and 11 3/4" diamiter. This is a very large and heavy duty disc,
equal to a 70's half ton pickup truck!I plan on adding dimensions here when I get to it.
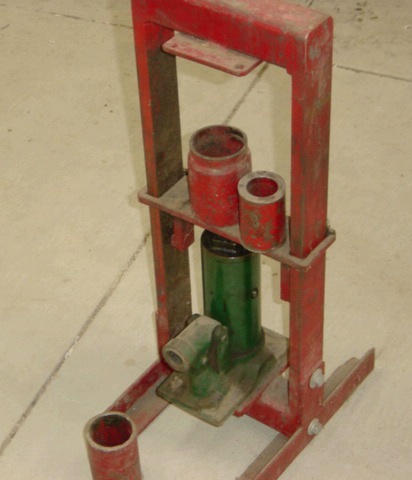
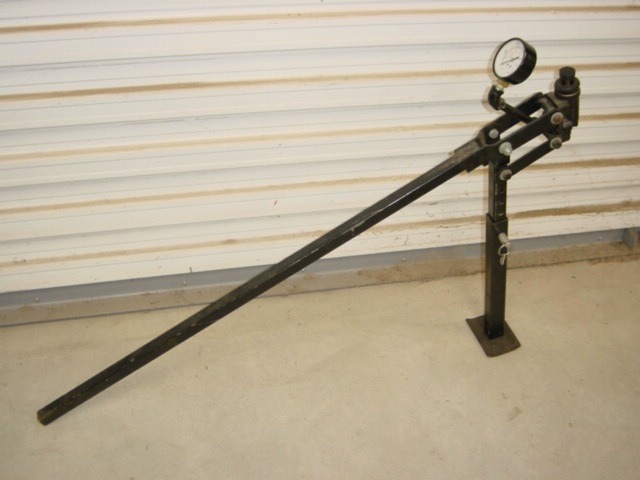
This frame is height adjustable and uses an international truck front wheel cylinder. The bore is 1 1/8" which is 1 square inch in surface area. The pressure guage in psi reads out pounds of spring rate. It needs a pair of bolt in tapered seats top and bottom to fit stock type Camaro springs and retain the spring from flying out by accident. This is not a problem with flat ground race car springs. You need a guage in the 2500 psi range. You pre load the spring by compressing several inches to normal ride height, then compress one inch and read difference. You can't just compress one inch from 0 psi reading because the end coils bottom out on each other and change the spring rate slightly.
I use this to check weight on each wheel. The International front wheel cyl is used again same as the spring checker. I screwed in a rubber bumper for a car hood, it pushes against the inside of the wheel rim. You block the car up with a 2X4 under each wheel, then use this to raise the wheel enough to remove the block and return the wheel to the height it was when it was on the block to take a reading.
Here is a 3/8" plate pin wrench and open end wrench I made to work on a power steering box.
I needed to change the seal and didn't want to do the hammer and chisel method of removing the adjuster around the input shaft.
I drilled two holes for the 3/16" X 1" roll pins from the hardware store, they didn't line up exactly with the holes in the box, so I had to "adjust" the spacing. I cut a slot with a bandsaw and put a chisel in the open gap at the end and hammered it in to spread the pins apart. It worked like a charm and is still plenty strong.
I chucked the pins in a drill and spun them against my belt sander to reduce the pin diameter slightly for an easier fit in the box. I tack welded the pins in place with about a quarter inch sticking down below the plate into the adjuster plug.
For the open end wrench, I made it from some scrap pieces I had laying around. I cut the jaw sides with a bandsaw and then torch cut the V section to clear the adjuster nut. I then ground the jaws parallel and to the exact width.
I made the handles the same length. Makes wrenching easier.
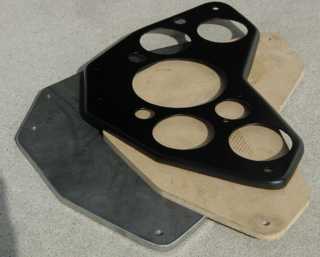
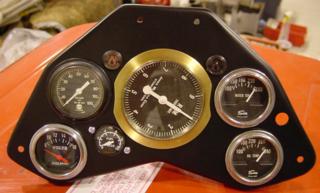
Aluminum gage panel made from .060 thick aluminum. The aluminum panel was cut out and holes punched, the panel was placed between the steel hammerform plate and the masonite top plate and bolted together, the edge sticking out was hammered over hte edge of the steel plate using a rawhide hammer. This will go on my Lola T-70
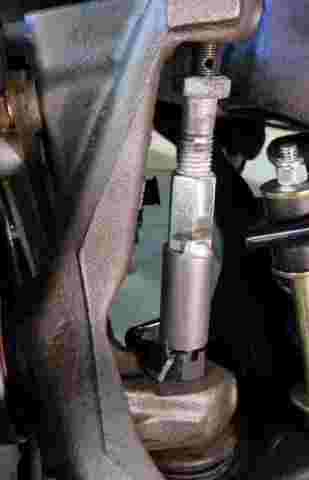
Here is a tool I made to pop the balljoints out of the spindle without damage to the rubber boots. It fits between the threaded ends of the balljoints and jacks them apart.
I used a 5/8 coarse thread bolt and coupler nut welded to a piece of 1" dia round stock. I cut a dish in each end to keep it from slipping off the ball joint studs.
I've only used it once on a newly installed balljoint but it worked great so far...
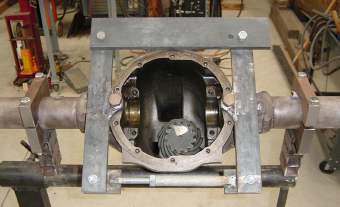
I needed a stand to do rear axle work, not only rebuilds but welding the axle tubes to the main housing and other mods. I really didn't want to make a separate stand for this work, so I made a plug in adapter for my engine stand. The support rod on the left is adjustable for leveling the housing. The housing must be level for proper welding on of any brackets.
I welded a washer to the stand to keep the bottom of the rod centered on the engine stand leg. When the adaper is removed only the washer is left.
The housing must be spaced up off the tube around 6inches to allow enough rotation room. the curved blocks are old engine main caps! A clip on oil pan would be nice to add too.

This tool should work on a 12 bolt rear too.
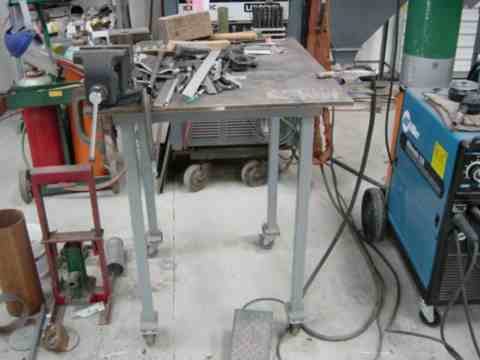
The edge sticks out to allow easier clamping. There are no obstructions between the legs to allow me to sit on a stool and operate the Tig pedal.
This was made to weld up small projects and is at an ideal height for sitting on a stool and welding up an oil pan or tubular A arms, etc.
I put rubber type wheels on it. the front pair do not swivel, the rear pair are swivel casters. This keeps "my" end stable and I can even use a hacksaw on something in the vise without it moving. If I need to move it, I steer it with the other end. Locking casters would be best, I couldn't find any when I built this.

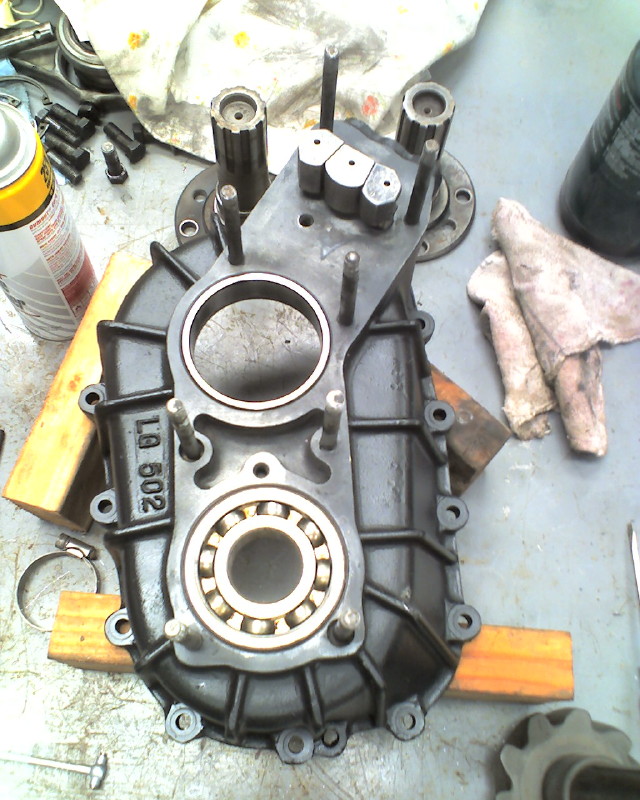
Hewland LG500 transaxle rebuild
I'll post some pics of the Hewland LG500 rebuild here